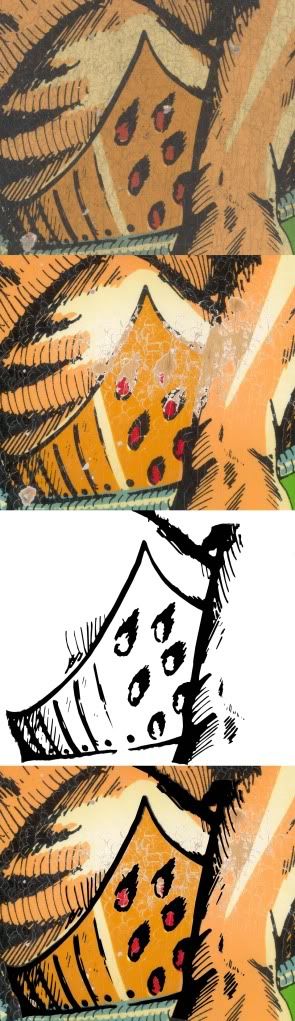
 Most of Flash's playfield cleaned up very nicely, but during the process, there were one or two areas that were slightly damaged by the mild abrasive. The worst area is shown at the right. The top photo shows the playfield before cleaning (the dark gray ball swirls are very obvious here). The next photo shows a much cleaner surface, but with some of the original paint scoured away. My solution to this is to use Photoshop to create a restored black line image of the affected area, and then use it to print on clear decal paper (third photo). The decal can then be placed over the damaged area (mockup shown in the bottom picture). Actually, I'll restore the flesh and gold solid color first, and then apply the decal over the top of that, but you get the idea.
I have used this method a few times in the past, and usually with really good results. Black decals printed on clear water slide decal paper ends up looking very crisp, and is virtually undetectable after the playfield has been clearcoated.
This is really the only area where this will be necessary on the whole playfield. I am getting much faster on Photoshop now, and recreating the black line image for the decal only took me a few hours. The decal paper itself is pretty expensive, but way more effective than trying to repaint these black lines myself; they are so fine that it would be virtually impossible to do so. I'll include a scan of the final repaired area after it is finished, and you can judge for yourself.
Alex and I plan to finish touching up the entire playfield this weekend. We are anxious to get it finished, since the clearcoating process takes at least a week or so to cure before trying to reconstruct the top of the playfield.
No comments:
Post a Comment