Monday, November 15, 2010

Pop Bumper Snap Cap Decal

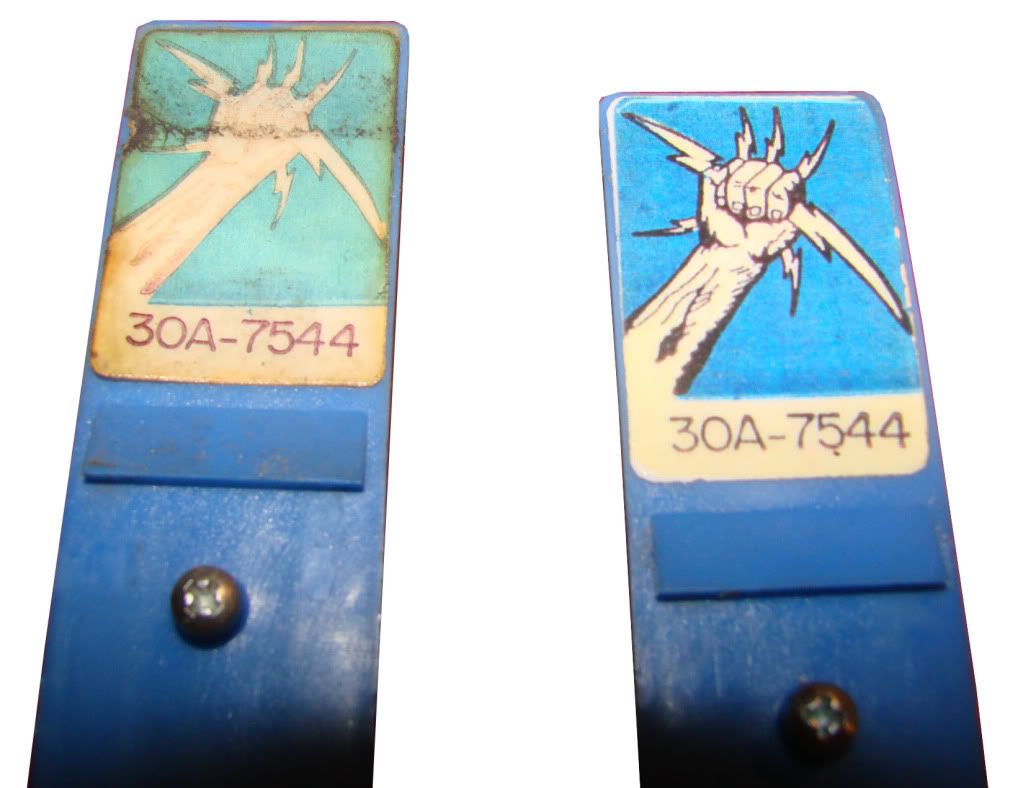
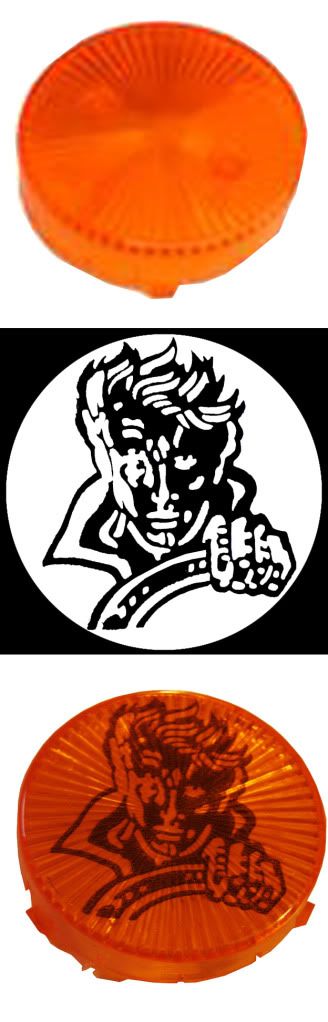
Spy Hunter was designed with a single pop bumper, and the top of the bumper cap had a game-specific design. The design was the face of the spy/driver featured on the playfield and on the backglass of the game, Agent GK (the initials of the original designer). When we picked up this game, the pop bumper cap was broken (very common, as they are fairly fragile), and it wasn't an original cap anyway, just a generic amber color.

To restore the pop bumper cap, I found an image of the original bumper cap art online, and touched this up in Photoshop. I printed in out in black on clear decal paper, and trimmed the edges. I took a new amber snap cap with no design, and pplied the decal, and a coule of coats of polyurethane. The finished product looks very much like the original snap cap, unique to the Spy Hunter game.

Alex & I have completed rebuilding all four flipper assemblies for the playfied, and this morning I re-installed the pop bumper assembly, including the newly minted snap cap. Everything is coming along; we hope to play our first game this weekend.


Monday, November 8, 2010

Spy Hunter Decals

Due to some improperly executed efforts to remove the original mylar protectors from the Spy Hunter, I was left with some significantly damaged areas on the original playfield. These extended over a good portion of the playfield, and needed to be addressed before the playfield could be clearcoated. I decided to make up some large-scale decals to address the problems. This is not the ideal solution; it would have been better to hand-paint or airbrush each of the affected areas, but this would have been incredibly time-intensive, and we needed to move ahead on this project. So I used some original playfield scans, and used Photoshop to develop a number of decals to apply to various areas of the playfield. While the colors do not perfectly match the originals, they are very close, and I think are not detectable by the casual pinball player.

Each of the decal files in Photoshop is split into color layers (black, blue, red, yellow, white, etc.), so that the overall look of the artwork is blocked in solid-color sections, just as the silk-screened originals would have been. I test print a couple of sheets, and adjust the actual colors to better match the playfield. Since printers can't print the color white, but simply assume a white background, I use solid white background decal paper for the color and white sections, and clear background paper when I have some black lettering or highlights that should appear against a color background on the playfield.

After the laser printer has done its job, each of the decals needs to be carefully cut out. I use an exacto knife to remove the circular insert areas that need to be removed from the decals so that the lighted inserts will be visible through the decal. I soak the decals in water for about 60 seconds, and then very carefully apply and adjust the decals to the proper location.

I have done this before, but only for smaller areas. These decals are very thin, and take well to clearcoating, although using larger decals may eventually cause an adhesion problem. Best if we can sell this one quickly, then...

Friday, October 22, 2010

New Venture

Alex & I are attending the Chicago Pinball Expo this week, and Marian made us a nice business card for the event. We'll stick a couple of them on Jungle King, just to let everyone know that we are in the house.

We are staying the night on Friday, the night that the Free Play Hall stays open all night long. The Jungle King is one of the few EM machines being featured there, most of the games are much higher end, and much more recent games. Hopefully it will hold its own, in spite of its age. We'll report back after the event.

Sunday, October 17, 2010

Setting Up Backglass Art File


Insomina has provided a time opportunity to finish up my Flash backglass art file in Photoshop. First I took about 12 closeup shots of the backglass with my digital camera (my scanner was negatively impacted by the thickness of the backglass refracting the light - see earlier post). I then used Photoshop's almost magical Auto-Align feature to automatically fix the individual photograph angles, and stich all of the images together in one composite file. After scaling the image to the exact size of the original backglass, it was time to clean up the art files.

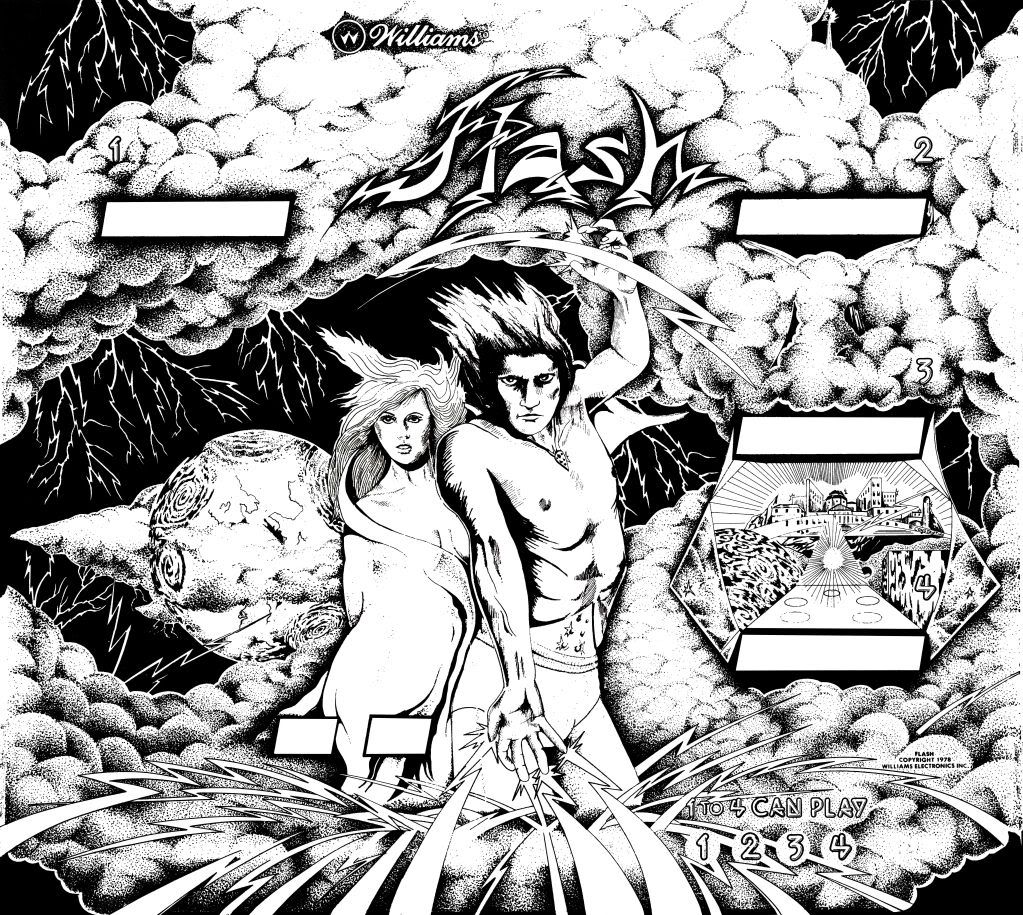
I do this color by color, starting with black, and working toward white. By separating each color into its own layer, I can more easily adjust color balance later on. The above image is the current black mask layer, which I am still working on. The other colors will be much easier, just blobs of color lying underneath the black mask. There is so much detail here, though, especially with the tiny individual flecks of black, giving an illusion of a smooth color gradient, that the black layer has taken some time. Without Photoshop's powerful color selection tools, this would be too time consuming to attempt.

The plan is to send a completed Flash backglass art file to a printer in the next couple of weeks, so that I can print a good translite (or two). We are selling the Flash at the end of November, so it will need to be done by then.

Tuesday, October 12, 2010

Jungle King Touchups


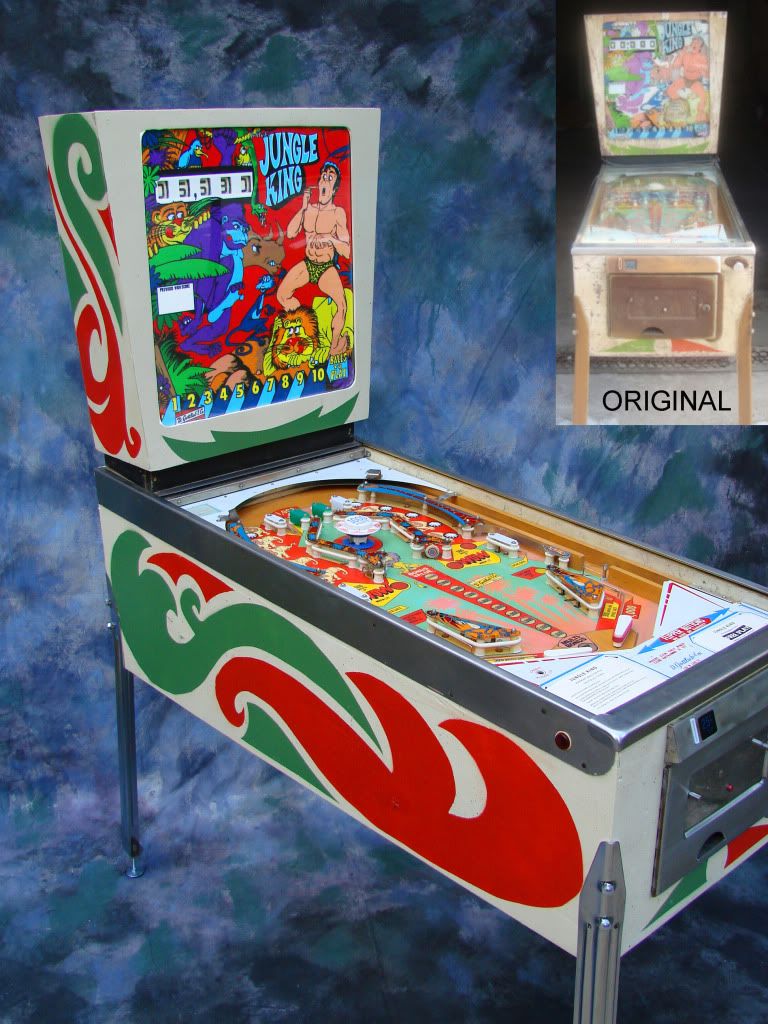
The Chicago Pinball Expo is being held in a week or so, and Alex and I will be attending, bringing with us our first project to set up in the Exhibit Hall/Free Play area. Jungle King has been operational since May of this year, but there were always a few niggling things that I had been meaning to fix or replace; the Expo gives me an excuse and a deadline to wrap them up. We replaced the legs (not with original Gottlieb-style, but close enough), the coin door, a few problematic lamps, and a couple of plastic lane guides with faded color. We also cleaned up the stepper units again (they have started to get a little dirty in just a few months), and re-adjusted the scoring wheels, to make sure they spin free.
After everything had been buffed up, we trotted the King out for a quick photo-shoot; one of the shots is displayed above. Some of the rest have been added to this web page, under the Jungle King tab. Seeing it all put together, the transformation is very gratifying to behold. I hope it works at Expo...

Monday, September 6, 2010

Pinball & Pizza Party Proves Popular


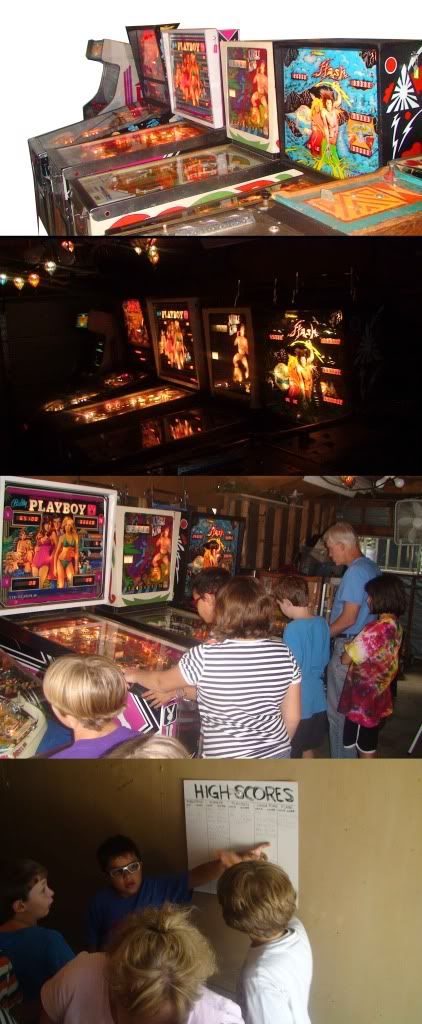
On Sunday, we pulled all of our machines together into the garage (the Frendt Arcade), and invited a bunch of neighboorhood kids and parents over for an afternoon pinball party. We closed down the garage in the morning, and banned anyone from entering the garage until 3:00 sharp. The prohibition resulted in a crowd of kids outside the garage door at 2:55, looking as if Disneyworld were just about to open. The newest entry in our pinball family, Flash, hadn't been played by anyone yet, so there was also some anticipation of a new title.

These five machines were all busy, nonstop, for about 5 hours. I was amazed at the hold these machines had on the kids. I can understand people my age wanting to play, to recapture a glimpse of a long-past childhood, but these kids were absolutely monopolized by pre-1980s technology for the entire duration. We featured tournament play for the first three hours, which in our case was just letting the kids write down their high scores on each machine on a chart hanging on the garage wall. High score on each machine at the end of the day won a prize. But even after tournament play ended, the machines were all busy.

Some kids favored the really old Jungle King, and others the more recent Popeye. I think the biggest hit of the day, though, had to be Flash. Everyone seemed to love this one, adults and kids alike. The game play is exciting, the sound effects and lighting are very cool, and it plays fast and smooth, due to its recent restoration.

A very gratifying day, especially in an age when Nintendo, GameCube, Wii, and XBox rule the day. The visceral feel of a pinball machine apparently continues to hold its own.

Sunday, August 29, 2010

Flash Runs! (And I Give Up)

After weeks of continuous consternation and vertiable vexation, Flash's MPU board was still staring at me tauntingly, knowing that only one minor tweak would have him purring like a kitten. But since I didn't know what that one tweak was, and time was running short, I folded like a deck chair, and simply bought a combination replacement board for the MPU and driver boards for Flash. I'll keep the old boards, and maybe next time around, I'll diagnose their problem properly, but in the meantime, the new board works terrifically, and Flash Runs, Flash Runs!

The right flipper is a bit weak, due to a partially shorted coil, but the new coil has been ordered, and otherwise, the game runs very smoothly. I expect to have him completely assembled, and moved into our garage/arcade by the weekend.

Speaking of which, is getting a bit crowded, at least for our tiny one-car structure. Popeye, Playboy, and Jungle King are sitting there now, and the Robotron video game will soon be joining them. Once Flash joins the brotherhood, there will be five pieces, with another 3 distressed pins sitting there like ladies in waiting. By way of celebration, we're looking forward to a little pinball party this weekend. I hope you're free.

Friday, August 13, 2010

Flash 4 or Flash 6?

I have spent the last week trying to fix something that wasn't broken in the first place.

This is why I don't trust electricity; if you have a non-functioning pop bumper, you can usually figure out the problem just by looking at it, or by using some really simple testing equipment. Not so with circuit boards, at least not the variety used to build Flash.

I have a System 4 Flash, although Williams later built Flash using a System 6 hardware set of circuit boards. I only had access to the board diagrams for System 6, which are pretty similar to System 4.

Unfortunately, one of the changes made from System 4 to System 6 (which I was unaware of), was the movement of the CPU chip and the Peripheral Interface Adaptor (PIA) chip, to roughly opposite positions on the MPU board. The are both 40-pin chips, and are not labelled in any clear way to identify their function.

I dutifully followed the detailed instructions for diagnosing problems with the MPU board, using the proper testing chip, etc., for the past week. I diagnosed a problem with the PIA, and therefore tried replacing it.

But when I did, things got worse, not better, and the diagnostic program stopped working altogether. Thinking I had a bad new PIA chip, I bought another and replaced it again, but with the same result.

Of course, the entire time, I was actually trying to put a new PIA chip into the old CPU socket, with less than ideal results, as you might expect. As it turned out, both my CPU and PIA were working fine, I just couldn't tell because I was testing them for the wrong set of signals. I finally figured this out on my own, after a week's time, much consultation with the pinball repair experts on the internet, and countless trips back and forth to my local electronics store. A dumb thing to get caught up on, but I guess to be expected for someone who didn't know a thing about pinball circuitry only four months ago.

Time for a week-long vacation now, so Flash will just have to be patient.

Thursday, August 5, 2010

Troubleshooting


After firing up the completed Flash project for the first time, all of the lights came on, the outhole kicker popped the pinball up into the ball shooter lane...... and that's it. The CPU board isn't booting up for some reason, which doesn't allow the machine to go any further. Please look at the picture above and tell me what the problem is. Otherwise, I'm going to have to troubleshoot this machine myself.

The particular operating system Williams used for Flash, Williams System 4, is notoriously difficult to troubleshoot, especially for CPU boot problems. There is a self-diagnostic program built into System 4, but the CPU needs to boot up first in order for it to be operational, so it's existence is almost like a deliberate and cruel joke. Luckily, some industrious soul has developed a third-party diagnostic testing chip for use in these machines, which I course ordered right away. Now begins the slow and laborious process of ruling things out.

On the plus side, all of the general illumination lighting appears to work fine, both on the playfield, and on the backbox. On the minus side, the brand new LED scoring system isn't lighting up at all. One thing at a time.

Tuesday, August 3, 2010

Putting it Together

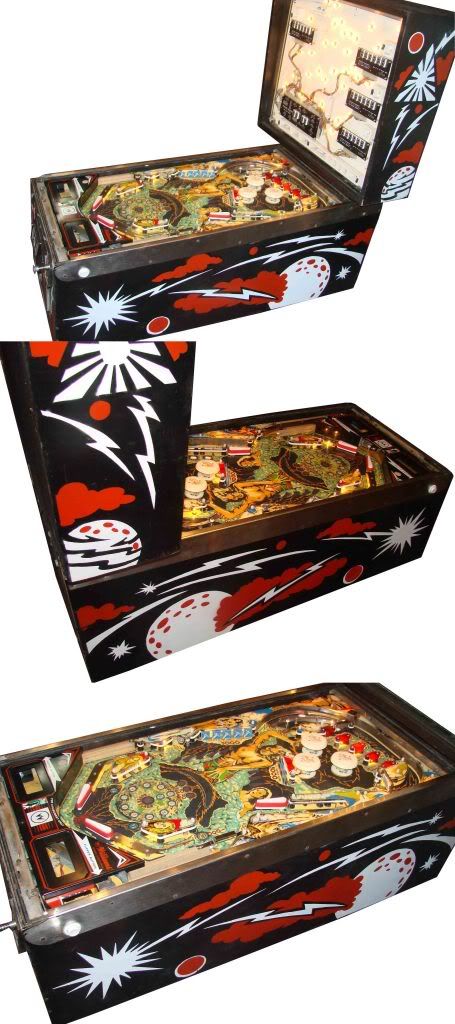
The nerve-wracking moment of truth comes when you first connect everything together, put the playfield into the cabinet, bolt on the backbox, make all of the electrical connections, and plug the thing in. Before sending the juice, it's worth admiring your work from an aesthetic point of view for at least a short moment, before you have all of your hopes and dreams crushed by turning it on and having nothing work properly. So here, a moment of pure reflection.

Repopulating the Playfield

Everything else having been repaired, replaced, or restored, it was time to repopulate the playfield. For this step, I carefully looked at my repair log, consulted my many tear-down photos, and simply reversed the steps to rebuild the playfield with all of the toys intact. This is somewhat slower than tearing the thing apart, but only slightly, since some of the playfield pieces that get installed are new parts that I have ordered from one of the vendors. Most of the time is spent looking for the correct little zip-loc baggie labelled with the exact playfield parts that I need. It's a gratifying process, and means that we're getting close to connecting everything together in its final configuration.

Flattening the Plastics

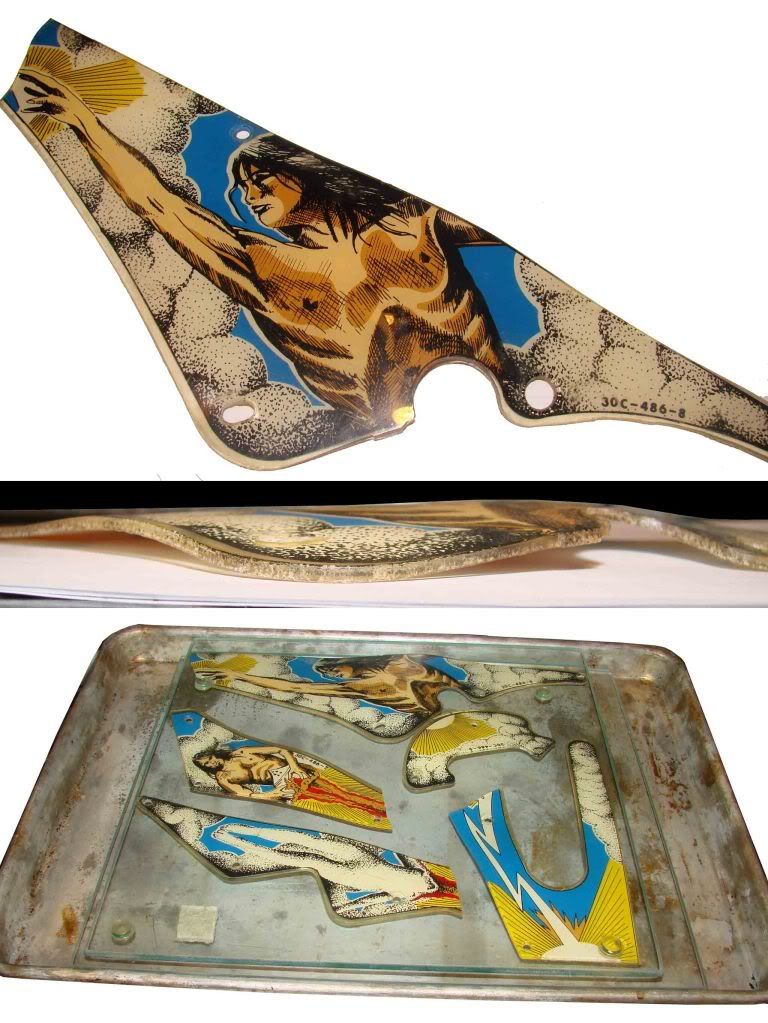
One of the unique problems that I had to face with Flash was the printed plastics that came with the game. These are the flat, plastic artwork pieces that are generally used to mask some of the mechanical devices, and are translucent so that the general illumination lighting will highlight the artwork.

Over time, the high heat of the bulbs originally used in these games tends to melt and slightly warp the plastics. On Flash, virtually all of the plastics were incredibly warped, but all of their artwork was intact, and the plastics were complete. Two of the larger ones had broken in half under the strain of the warping, but no shards were missing.

So the main problem is how to flatten plastics that were otherwise in good condition. Here, my kitchen skills came to the rescue.

I took the plastics and sandwiched them between two perfectly flat pieces of glass (I used panes of glass from a glass shelving unit). Then I put them on a baking sheet, and weighted them down with some heavy stacked pots. I popped them into the oven at 250 degrees, and checked them every three minutes. (You definitely don't want to overbake these.) When they reached just the right temperature, they softened, and the weight of the pots pressed them flat. I immediately removed them from the oven, and let them cool between the glass panes. This restored them back to their original condition, or nearly so. I was able to use super glue to reattach the separated plastics, and reinstalled them on the playfield.

Circuit Board Repair

The most tedious part of the restoration process, in my opinion, is the circuit board repair. You can spend hours and hours replacing sockets and connectors, without being completely sure afterword that what you have done will actually work. I don't trust electricity.

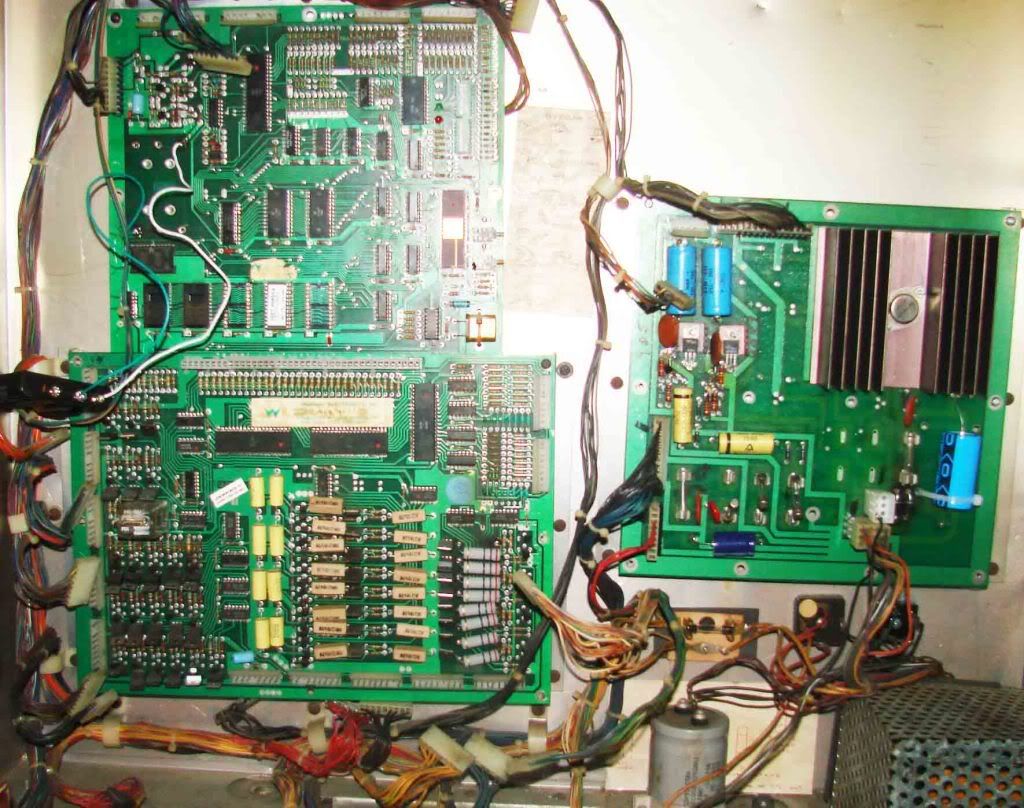
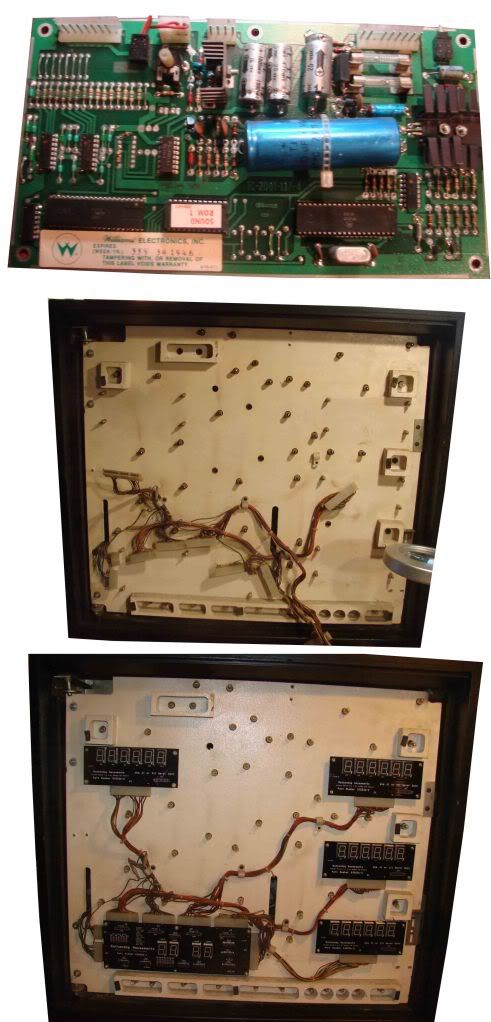
The boards that came with Flash are from a Williams System 4 type game, which contained early circuit boards that orginally came with a boatload of troubles. Before even turning the game on, I replaced the 40-pin connector between the CPU and the driver board, several capacitors, diodes, and varistors on the power supply board, all of the capacitors on the sound board, a bridge rectifier in the backbox, multiple Molex wire connectors, and replaced the missing display units with a brand new, Rottendog LED scoring display system.

After all of this I tested the supplied voltages being generated by the power supply, and they were all right on the money. One big problem down, or avoided altogether. And I only burned myself about 7 times with my new soldering iron.

Mechanicals

Every moving part on the playfield, not just the coils, needed to be completely disassembled, cleaned, adjusted, and rebuilt. This included the drop target assemblies, pop bumpers, slingshots, out-hole kickers, spinners, rollover buttons, rollover switches, targets, and stand-up switches.

In addition to this, every light bulb was replaced underneath every feature light insert, and inside every general illumination location. This was several nights worth of work all by itself, but is one of my favorite parts of the restoration process. It's almost therapeutic, sitting on my stool, tinkering and puttering with little mechanical devices while listening to a recorded program on my laptop. It's a slow process (there aren't many quick ones), but once it's done correctly, you know that most of the mechanics beneath the playfield should just quite simply work, assuming they are getting the correct signals from the circuit boards. Of course, that's another problem altogether.

Coil Replacement

Normally, older pinball machines have solenoid coils that are dirty and need to be re-sleeved, but rarely are all of the coils burned out entirely. Not so here. Most of the mechanical coils on Flash needed to be replaced, probably due to some sort of problem on the circuit boards. Some of the coils are unique enough to only be available from one vendor. This outhole kicker coil is an example of a coil that was completely burned. The coil has heated up to a temperature which melted the plastic sleeve inside the coil, seizing the entire works.

Each of the mechanical coils on the playfield was taken apart, cleaned and re-sleeved (or completely replaced as necessary), and reinstalled on the playfield. All of the metal moving parts (and the non-moving ones, too, come to think of it) were cleaned, and the resulting motion of each of the parts was checked to ensure smooth and easy movement.

Drop Targets


Flash has two banks of drop targets, five in one, and three in the other. Drop targets are fun to aim for and complete, but they are somewhat tricky to fix on a playfield. First, the targets themselves are usually beat to hell, and the artwork, if any, is typically ruined. That was the case here, so I found some reproduction decals made by Bay Area Amusements in California to replace the fading artwork. Luckily, Flash was a popular game, and these decals are available.

The mechanics of the drop targets were a little trickier. Every little device needed to be taken completely apart, cleaned with Q-tips and alcohol and rebuilt. The springs that pull the targets down have generally lost some of their elastic power, and need to be replaced. Williams constructed these drop targets and switches in a tricky way, so they are hard to rebuild.

Final Cabinet Painting

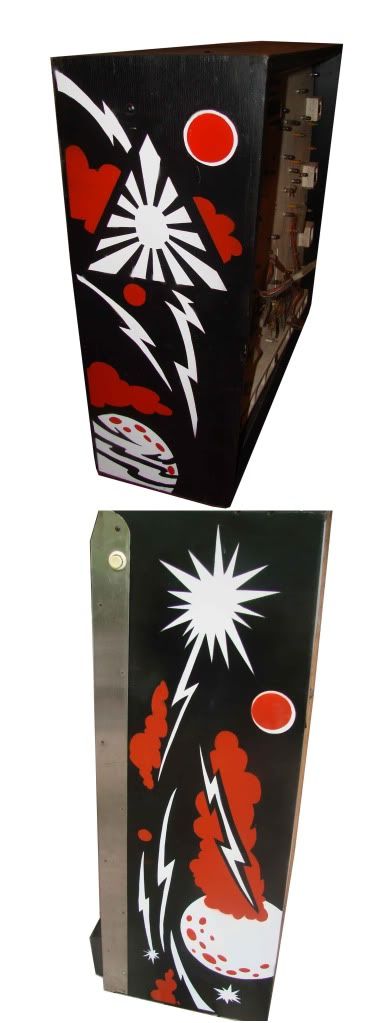
Flash caused me more trouble on the cabinet and backbox painting effort than he should have. There are only four colors involved: a black background, with white and dark red accent colors. After painting the solid black background, I made plastic stencils for each of the remaining colors, for each side of the backbox and cabinet (10 total stencils). Then, I spray painted all of the white, and followed up with all of the dark red. Easy.

But. I started making the stencils using a .003-inch thick polystyrene plastic. This plastic worked pretty well, but it was just thin enough to allow a little peeling up of the stencil around stressed corners or tight curves, and allowed too much overpainting. So these areas needed to be touched up. Later, I found that using a .005-inch plastic worked much better as the stencils tended to lie much flatter (especially after being sprayed with repositionable adhesive, and applied to the cabinet with a rolling pin).


But the damage had been done, and I ended up painting each color multiple times before getting it right. Anyhow, the final results look really vibrant and clean, and should make for a nice dramatic backdrop for the playfield and backbox artwork.

Tuesday, July 27, 2010

Restored Playfield

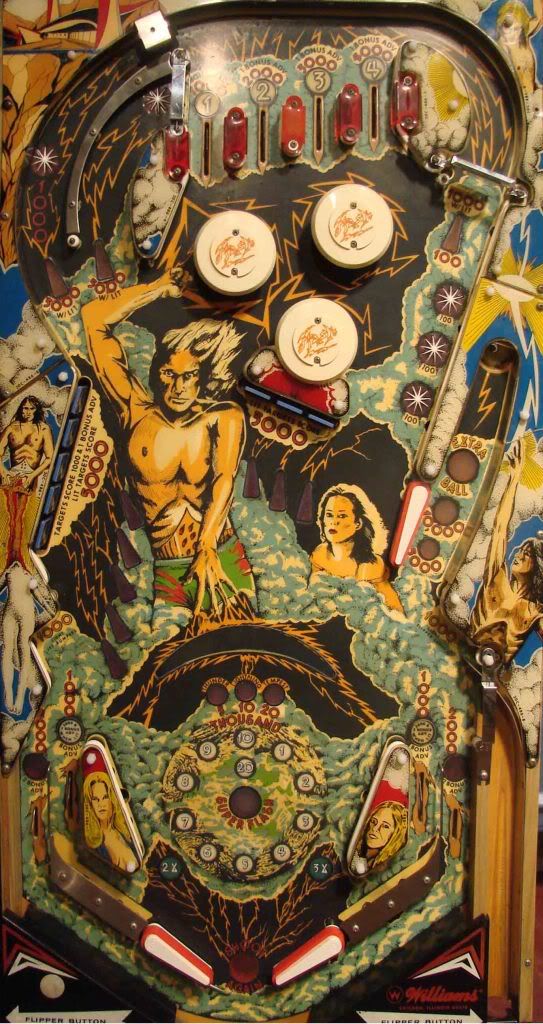
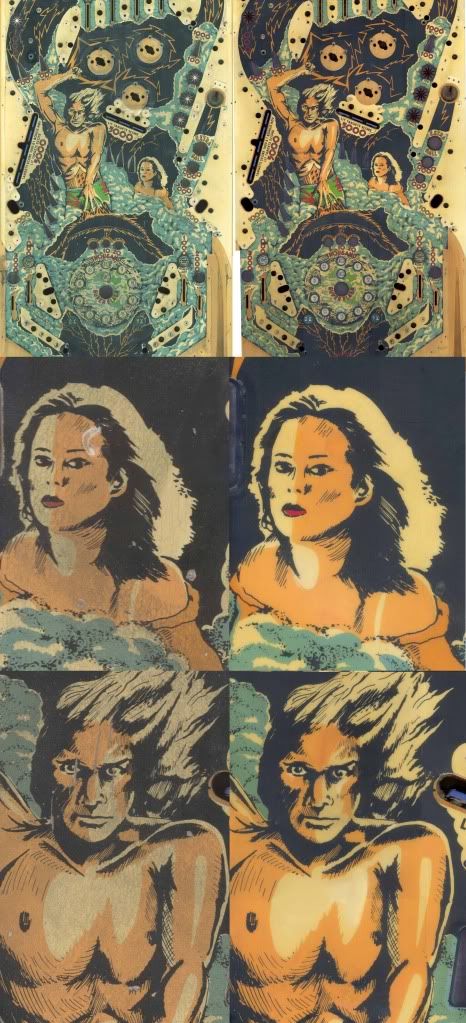
Now that the playfield has been cleaned, repaired, touched up, and clear coated, we can start to place the playfield parts back on top. But before that happens, I scanned the finished playfield just so we had a record of what it looked like before and after. Overall, I really am happy with the improvements. This photolog shows the before and after of the whole playfield, as well as a couple of interesting closeups. The face of the woman, which had been gouged by the upper playfield flipper, has been repaired and repainted with nice results. The face of Flash himself, which had several vertical gouges to deal with, has similarly been restored to his former glory. It's amazing what some patience and perseverance can do.

The clear coat has had a couple of weeks to dry and cure, so the next job will be to work on the mechanicals beneath the playfield. Alex usually helps with this part, but he's away at camp this week, so it's just me and the pop bumpers.

Tuesday, July 20, 2010

Two Additions

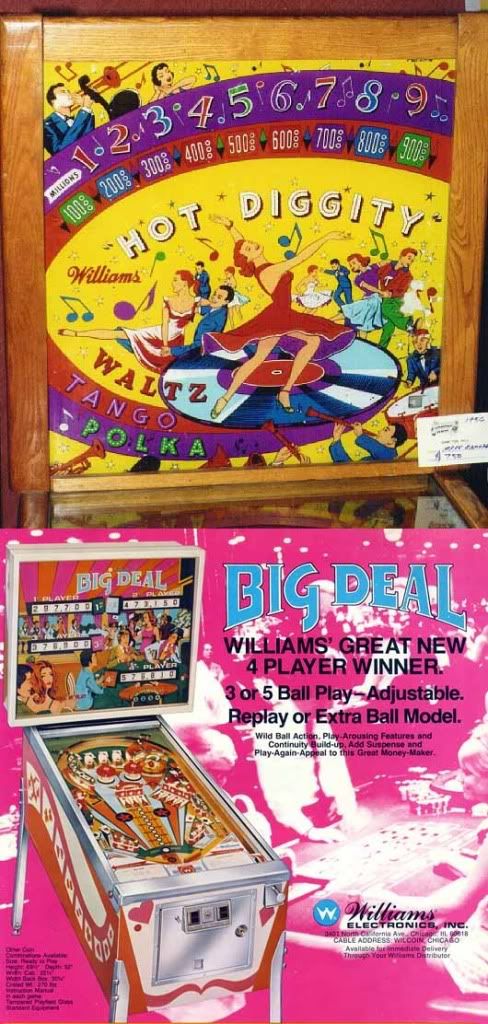
After a particularly acquisitive weekend, we have two new entries to our pinball family. We drove to Battle Creek on Saturday to pick up our first woodrail, a 1956 Hot Diggity. This one's a beauty, and the playfield, while very dirty, looks in reasonable good condition, a great candidate for restoration. The artwork is great, and has a music/dancing theme. We bought this from John Dayhuff, and accordingly got a tour of his basement after loading Hot Diggity into the back of our SUV. He has 70 working pins set up down there, and we thought we had gone straight to heaven. Anyway, he's a great guy, committed to the hobby, and I hope to do business with him again.

The next day we took a shorter trip, only 15 minutes away, to pick up a 1977 Big Deal. This one's in worse aesthetic shape, actually, but not beyond repair, the backglass looks pretty good, and the price was right. It's our first card-themed game, and a four-player EM, so it has twenty separate mechanical score reels to clean and adjust. Twenty. I was told that all of them work but one, but you know how that goes.

So with six pins, we're about maxed out on space until we lighten the load by selling a few.

Monday, July 12, 2010

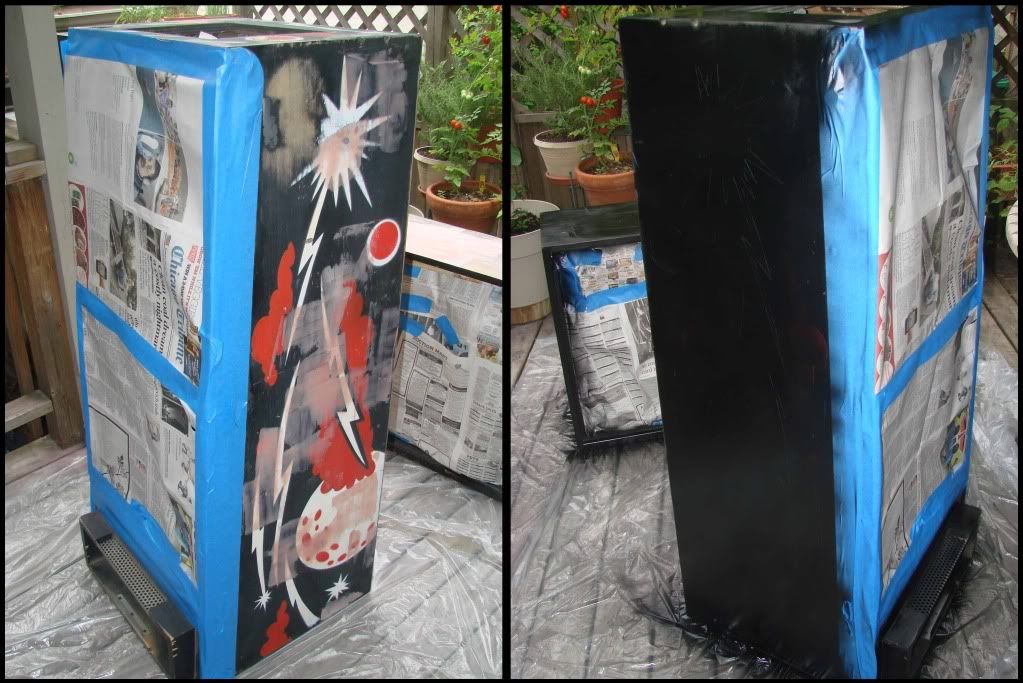
Masking & First Coat


Nothing too dramatic to report here: we used the Chicago Tribune for about the only thing it's really good for anymore, which is spray paint masking. Alex used up the first can of black applying the first coat, and called his friends up to watch him do it, maybe just to prove to them that he actually does work on these machines. This fact having been established, he and his friends went off to play computer games, leaving me to do the touchup coat.